Showing posts with label Baking. Show all posts

Thursday, June 20, 2013

What A Larger Kitchen Means (Help with Pancakes!)

Growing up, my family always had a rather small kitchen.  I often heard my mom mention wanting a larger kitchen, but I didn't really know what that meant.  Every kitchen I had been in was about the same size as our kitchen.  No one I knew had a "larger" kitchen.  Besides, what would you do with one?  (Keep in mind, this was my childish mind speaking.)

I started to understand the upside to a larger kitchen around the age of 12, when I started to really cook.  By this time my brother was already cooking as well.  Two adults and two teenagers could NOT fit in our kitchen at the same time.  In fact two adults could barely fit in the kitchen without getting in each other's way.  Yet still, what did a "larger" kitchen look like?  I had still never seen one.  

Then two things happened around the same time:  My grandmother bought a larger house and our next door neighbor remodeled her kitchen.  Suddenly I knew exactly what I wanted in a kitchen.  I wanted something more that two people could work in at once.  I wanted something open enough that I could teach my children to cook and do dishes.

It was nearly two decades before I got my large kitchen, but the small kitchens I worked in in the interim taught me a lot about appreciation.  Last year, when we were in Washington visiting my FIL, my SIL referred to his kitchen as a "two-butt" kitchen.  That meant that one person could be working at the stove, counter, or sink and there was just enough room to allow someone to pass or stand behind them.  I love this phrase and now use it quite often.  

Our first apartment had a "three-butt kitchen".  Until now, it was the largest kitchen I had ever had.  It was tucked into a corner and had very little counter or cupboard space, but it was open, so it wasn't all bad.

Our second and third apartments were both "one-and-a-half-butt kitchens".  They were not family friendly at all.  I love to cook, but these kitchens made it very difficult to achieve anything beyond small batches.  I found myself doing a lot of prep work in the living room.

Our current kitchen is an estimated "five- or six-butt" kitchen.  That means we had four people working in the kitchen at the same time and there was plenty of room for more.  My husband actually stopped what he was doing and pointed it out.  We both laughed and had to explain it to my sister and mother.

I love the fact that I have a kitchen large enough for many people to congregate.  I also love that it is centrally located, so anyone who is working in the kitchen doesn't feel like they are banished to the back of the house.  To me cooking is a social activity, not a chore.


That being said, I mentioned above that I started cooking around the age of 12.  This is kind of a tradition my parents started that I want to continue with my kids.  My parents started teaching us how to cook at a young age.  By the time we were 12 we were tasked with being able to cook an entire meal unaided (my meal was meatloaf, baked potatoes, and corn).  I think this instilled in all three of us a love for cooking, and an understanding of the importance of independence.

At this point my little guys are only 6 and 3, but it won't be long before it is their turn to cook for themselves. I want their repertoire to go beyond Mac & Cheese and Top Ramen.  That is why I am so excited about them being able to help me in the kitchen whenever they get the chance.

A few weeks ago I decided to make a large batch of pancakes (in order to freeze left overs).  As I was going about my routine of prep work I saw G peeking around the corner.  It suddenly dawned on me that now was the perfect time for them to help.  It was Memorial Day and we had no plans to make us hurry.  So Cooking Lesson #1 commenced.  They both took turns putting in the ingredients and stirring.  Afterwards, both took turns helping me portion the batter onto the griddle (we have one of those cool pancake squirters).


I'd like to think they enjoyed them all the more for having helped make them, but who am I kidding...they love them no matter who made them.


PANCAKES
(Modified from recipe in Betty Crocker Cookbook)

Ingredients
1 cup flour
1 Tbsp sugar (I usually add more, but I like mine sweet)
3 tsp baking powder (I know it's a Tablespoon, but that is how the recipe is written)
1/4 tsp salt
1 egg
3/4 cup milk
2 Tbsp oil or butter (melted)

Directions
1. Heat a griddle or frying pan over Medium heat.
2. Mix together all dry ingredients in a medium mixing bowl.
3. Stir in milk using a wooden spoon.
4. In a small bowl, whisk together egg and oil until frothy.
5. Stir egg mixture into batter until smooth.
6. Oil griddle, then ladle batter into small circles.
7. When batter starts to bubble (about 2 minutes), using a wide silicone turner, flip pancakes, cook for additional 1 minute.  Remove from griddle.

Tuesday, May 14, 2013

Deep-Dish French Bread Pizza


Just like your average American family, my family loves pizza.  But I am going to let you in on a secret...that is not really a secret:  take-out pizza can get 1) boring, 2) expensive, and 3) detrimental to your wardrobe.

The great thing about pizza is that it is easy (at least the take-out kind), and a great option for long days where cooking dinner just doesn't sound so great.  This argument seemingly nixes my suggested alternative: Homemade Pizza.  But wait, not so fast.  Homemade pizza can be easy!  It is called French Bread Pizza.  You know those sandwich rolls you have in your cupboard?  Cut them in half, spread some pizza sauce on them, sprinkle cheese and toppings, and bake them.  Easy as making a sandwich!


Now, this option is great for the kids who only like one or two toppings on their pizza, but if you are anything like me, you love the combination of flavors multiple toppings provide.  With French Bread Pizza, multiple toppings can be tough.  They usually fall off, and that can get frustrating.  Well, I found a solution to all of your problems (at least as they pertain to French Bread Pizza).  It is called Deep Dish French Bread Pizza.  The process is just a couple more steps, but it takes virtually no time at all.


Instead of cutting the Roll in half, just cut the top 1/2" off.  Using a small serrated knife (i.e. steak knife) cut around the inside of the roll to loosen it up.


Hollow out the roll, leaving about 1/4" - 1/2" rim and crust all around.


Add the pizza sauce all the way around the edges, not just on the bottom.  This will add to the flavor greatly!


And then we layer!  Cheese, toppings, more cheese.  I even sprinkle garlic spread on top of mine to give it a bit of a kick!


Bake on 400°F for 8 minutes, or until it reaches your desired crunchiness.

So now your only argument is that your local pizza joint needs your business.  It is a fact, the take-out pizza industry is thriving.  It does NOT need your business.  Don't think you are supporting it with your weekly (or bi-weekly) purchase.  There!  I have now released you from your dependency on take-out pizza.  That is not to say you can't enjoy take-out from time to time, I do like Papa Murphy's, but that is a treat, not a regular meal!

Tuesday, May 7, 2013

Apple Chips


Our family goes through phases with food.  We like a food, buy a lot of it, eat a lot of it, buy more of it, eat more of it, buy even more of it, get tired of it, and then we are left with a bunch of food we are not quite willing to eat any more.

This happened this week with apples.  My kids were tired of apples, yet we still had three apples that were going to go bad if someone didn't eat them.  Then I saw a Pintrest post that solved my issue:  Apple Chips!

So I sliced up the apples very thin, pre-heated the oven to 200°F, sprinkled them with a cinnamon-sugar mixture, and baked them for two hours.  They'll keep for a week in an air-tight container, but they won't be hanging around that long in my house.

This is definitely a healthy alternative to candy and chips, and I can make them while the boys are at school and have them ready when they get home.  WIN!

APPLE CHIPS

Ingredients:

- Apples
- Cinnamon
- Sugar

1. Pre-heat the oven to 200°F.
2. Core apples if you wish.  Slice them very thin.
3. Mix equal parts cinnamon and sugar in a small dish.
4. Sprinkle apple slices with mixture.  Flip and repeat on the other side.
5. Bake for two hours or until the slices take on your preferred level of dehydration.  (I like mine slightly crispy)
*I also decided to flip the chips 90 minutes in to help them dry a bit more.

Sunday, May 20, 2012

Simple Granola


Here is a dilemma that I never thought about... store bought granola has way too many ingredients.  I found a recipe for granola bars that I wanted to try out, but all of the granola I found had tons of stuff in it that I didn't want in my granola bars (like raisins, almonds, seeds, etc.).  So I did the one thing any self-respecting cook would do.  I looked up a recipe I could modify.

Here is ANOTHER dilemma... granola recipes have even more ingredients.  I wanted one that I could make with ingredients that I had on hand.  It was a tough battle, Google almost beat me, but I conquered the challenge and found a site that had a granola base recipe!  I figured I could handle seven ingredients, and low and behold I actually had all of them.  Even better yet, many of the ingredients are exchangeable based on preference.

I'll post my granola bars soon!  In the mean time, here is my success to share with all:

Simple Granola Base
(adapted from Espresso and Cream)
3 cups old fashioned rolled oats
2 Tbsp brown sugar
1 tsp cinnamon (I use Siagon Cinnamon)
1/4 tsp salt

1/3 cup honey (I also like using agave, when available)
1/3 cup light cooking oil (vegetable or canola)
1 tsp coconut extract (vanilla or almond)

1. Pre-heat oven to 300 degrees.
2. Mix all of the dry ingredients in a medium bowl.
3. In a small mixing bowl, whisk together honey, oil, and extract.  Pour over dry ingredients and mix well, using your hands if needed.
4. Spread mixture in a thin even layer in a baking dish.  Bake for 40 minutes, stirring once or twice.
5. Remove from oven and cool, stirring occasionally.  When cool, store in an air tight container or Zip-Loc Bag.

Saturday, May 19, 2012

Homemade Oatmeal...oh yeah!


I should mention right off the bat...I am the oddity in my family.  My family loves coffee and/or tea...I don't.  My (very Irish) family loves corned beef and cabbage...I don't (at least I have my sister on my side about this one).  My family LOVES hot cereal...I DON'T!  I have never been able to choke down oatmeal, porridge or Cream of Wheat.  To me, the slimy consistency rendered it inedible.

Well, when my oldest son was very little my parents would watch him at least twice a week while my husband and I volunteered at our Church.  It was inevitable, seeing as food options for a one year old are still pretty limited, that they would feed him oatmeal.  And, of course, he loved it.  Two and a half years later, his brother followed suit.  The oatmeal bug was running rampant in my house, and I was powerless to stop it!

I quickly learned to be okay at least making oatmeal for my family, if not eating it myself.  It was pretty easy with all of the instant oatmeal options they have at the stores.  My boys particularly love the Dino Egg Oatmeal that Quaker has out.  But those instant oatmeal packs can be expensive.  I needed to come up with a way to feed the boys oatmeal without breaking the bank (or my gag reflex).

After some searching, I found a recipe that looked promising (and I had all of the ingredients on hand) so I adapted it for taste and made it for the boys.  It turned out super pretty if I do say so myself.

Nutty Cinnamon-Raisin Oatmeal
(adapted from Summer Tomato)

1 cup Water
1/2 cup old fashioned rolled oats
1/3 cup raisins (I used Sun Maid)
1/4 cup pecans, crumbeld
1 tsp cinnamon (I prefer Saigon Cinnamon)
1 Tbsp brown sugar
Splash of Milk (soy or almond, too!)

1. Add water and raisins to a small pot.  Bring to a simmer and cook for 4-5 minutes, until raisins are nice and plump.
2. Stir in oatmeal.  Cook for an additional 5 minutes or until the oatmeal is your desired tenderness and consistency.  You can add water a tablespoon at a time to achieve this, as well.
3. Spoon the oatmeal into a cereal bowl.  Add a splash of milk.  Top with pecans, cinnamon, and brown sugar.  Stir together.  Add more milk to reach your desired consistency.  Enjoy!

Friday, January 27, 2012

Oreo Truffles


I wrote in a recent Cookie Dough Truffles post about my desire to find egg and dairy free recipes.  We have many friends who are either lactose intolerant or have food allergies that prevent them from enjoying most of the recipes I prepare.  I am constantly aware of our friends politely refusing meals and desserts, and feeling ghastly when I suddenly remember their allergy.

This occurred once again with the Cookie Dough Truffles.  I remembered at the last minute that the recipe included condensed milk and that our friend Danny was allergic to both eggs AND milk.  This led me to a determination that I would find a truffle recipe that was both egg and dairy free.

I figured the easiest recipe to start with would be Oreo Truffles.  HA!  All Oreo Truffle recipes have CREAM CHEESE in them!  Ugh!  Well, after about an hour of sifting through what seemed like hundreds - but was probably only dozens - of recipes I decided to create a recipe of my own.  I even posted my challenge to myself on Facebook.

It came to me pretty quickly that I could substitute the cream cheese with frosting.  Kind of like cake pops, except with Oreos and no sticks.  This is what I came up with:


Gather up Oreos, frosting, chocolate chips, shortening (not pictured), and sprinkles for decorations.


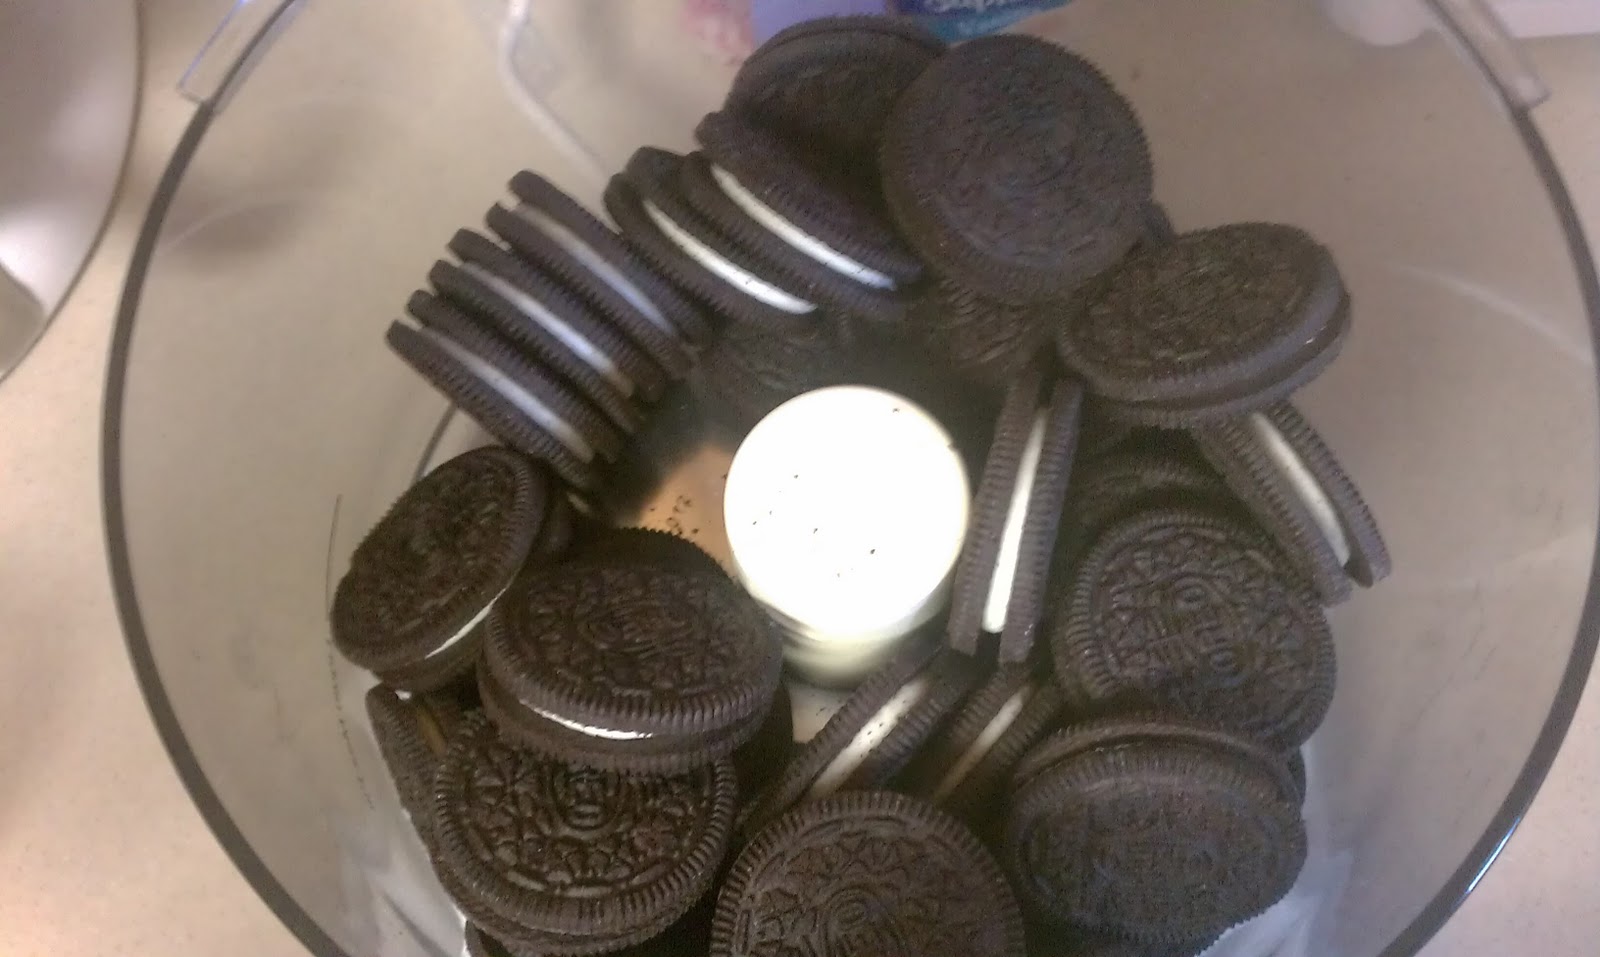
Throw the entire package of Oreos into a food processor.  Chop up until the cookies are all fine crumbs. Pour the crumbs into a mixing bowl and stir in the frosting.  Chill for at least an hour.


Using a spoon, scoop up small bits of dough and roll into 1 inch balls.


Place balls onto a wax paper lined baking sheet.  Put back into the refrigerator for at least 30 minutes, or until you are ready to dip in chocolate.


In a small bowl, combine 1 cup of chocolate chips and 1 tsp of shortening.  Microwave in 30 second bursts, stirring between every heating, until the chocolate in creamy and lump free.  You will need to prepare approximately three batches of dipping chocolate to coat all of the truffles.


Using a candy fork or spoon, dip each ball into the chocolate, coating completely.  Tap excess chocolate off before transferring on a wax paper lined baking sheet.


Before the chocolate sets, decorate as you wish.  Return to the refrigerator to chill for at least an hour.


My son really got into helping with the decorations.


Remove from the waxed paper and store in an air tight container in the refrigerator.  Serve chilled!

WARNING!  These are super sweet!  I made them way too big.  In the future I will be making them smaller.  This batch made about  three dozen.  Smaller balls will stretch the batch to make about 4-5 dozen truffles.


OREO TRUFFLES


1 pgk (approx. 39) Oreo Cookies
1 can (2 cups) Vanilla Frosting
3 cup semi-sweet chocolate chips
3 tsp shortening
Decorative sprinkles


1. In a food processor, grind Oreo cookies until they are all fine crumbs.
2. In a mixing bowl, combine cookie crumbs and frosting into a sticky dough.  Cover and chill for at least an hour.
3. Line a large baking sheet with waxed paper.  Using a spoon, scoop up small bits of dough and roll into small balls (about 1/2" - 1").  Place balls evenly spaced on the baking sheet.  Return to the refrigerator to chill for at least 30 minutes, or until you are ready to dip them in chocolate.
4. In a small, microwave-safe bowl, melt 1 cup of chocolate chips and 1 tsp of shortening at a time in 30 second bursts (stirring between every heating), until creamy and lump free.  Let sit for a few minutes to cool down so you don't melt the balls.
5. Dip each ball into the chocolate and coat completely.  Using a candy fork or spoon lift out of the chocolate and tap off excess chocolate.  Place truffle on to waxed paper lined baking sheet.  Decorate as you wish before the chocolate sets.  Return to the refrigerator.  Serve chilled.


*Store in an air tight container in the refrigerator.

Thursday, January 26, 2012

S'Mores Treat Bars


Close your eyes.  Imagine you are out in the woods, sitting around a fire and laughing with your loved ones as you hold a stick in your hand with a marshmallow perched precariously on its end.  The smell of wood smoke permeates the air.  The sound of crickets and frogs echo all around.  Memories of the sun glistening off the water as you frolicked in the shallows with your kids earlier in the day run through your mind.  Yup, that is exactly how I dream of Summer.

However, it's raining outside, so it's pretty obvious that it is NOT Summer.

That doesn't mean, though, that you can't enjoy some of the best perks of the season right now.  Of course, I am talking about S'mores!  What else would I be talking about?  I am certainly not talking about swimming in a lake (as I look outside at the veritable lake that is forming in my garden).

Now, before we get to the recipe, let me explain something about my husband.  I have said this before, but I need to reiterate this.  He does NOT have a sweet tooth.  Growing up, he was not allowed to eat candy, and that mentality has carried over into adulthood.

Don't get me wrong, his childhood wasn't sugar-free.  There was one thing he was "allowed" to eat as a child and that was Rice Krispy Treats.  His mother made them all of the time.  Everyday.  I am not joking.  He has told me that the smell was so prominent in his house that the thought of it makes his gag, even today.  He informed me a few years ago that he would really appreciate it (he used a bit more basic and hard wording) if I never made Rice Krispy Treats.

Needless to say, I was nervous about making these, but I was intrigued.  I love S'mores and have spent most of my teen years and all of my adult life keeping my eyes open for a good S'mores recipe that didn't require a fire.  I asked my husband first before I made this recipe and he said he wouldn't mind and would even try them.  With that encouragement, I rounded up the ingredients and proceeded.


Golden Grahams (which were luckily on sale at Target), butter, marshmallows, and chocolate chips and all you need.  I also used Magic Shell topping for decorative purposes, but you can melt chocolate chips for the same purpose (in face I recommend this method over the Magic Shell).


Melt 1/4 cup (1/2 a stick) of butter in a large pan.


Stir in marshmallows until completely melted.  Remove from heat.


Add cereal to the marshmallow cream and mix thoroughly.


Stir in chocolate chips briefly.  Try not to let the chocolate chips melt.


Pour into a greased 9"X13" baking pan.  Press down firmly.  Allow to cool completely.


Once cool, drizzle Magic Shell (or melted chocolate chips) over the treats and allow to set.

Cut the treats into 1"x2" pieces and serve.

The Verdict:  My husband actually liked them!


S'MORES TREATS BARS
  • 1/4 cup butter
  • 1 (10 oz) bag regular marshmallows
  • 1 box of Golden Graham cereal
  • 1-2 cups Chocolate Chips
  • Magic Shell (optional)
In a large sauce pan, melt butter over medium heat.  Add marshmallows and keep stirring until the marshmallows completely melt and you get a marshmallow sauce.  Remove from heat.

Add Golden Grahams and stir until they are all well coated.  You can chose to crush some up before adding them if you want some smaller pieces.  Next stir in chocolate chips.

Grease a 9x13 pan and press S'mores down.

Drizzle with Magic Shell for a pretty appearance.

Tuesday, January 24, 2012

Cookie Dough Truffles


Ok, raise your hand if you eat raw cookie dough.  If both hands are not raised above your head while you are jumping up and down, you are either lying, or allergic to eggs.

I love cookie dough WAY too much.  I grew up sneaking into the kitchen while my mom was baking and stealing cookie dough.  Some of my earliest memories were of my mother handing each of us a spoonful of cookie dough to prevent us from sticking our fingers in the bowl.  When they came out with cookie dough ice cream I thought it was the most brilliant invention on the face of this earth.  So brilliant, in fact, that I almost switched allegiances from Mint Chocolate Chip (not likely ever to happen, by the way).

When I first stumbled across these babies I reacted how normal cookie dough loving person would - "Ooh, I'm gonna have to try those sometime."  But then I noticed something a bit special about these.  They have no eggs in them!

You may ask why I am so hung up on the egg allergy thing?  Well, you see, we have a friend who spends an inordinate amount of time at our house.  This friend just happens to have food allergies - eggs being a prominent one.  Knowing him, and having a child with food allergies, has given me a strong resolve to find recipes without eggs or milk in them.  So this one is for you, Danny!

Edit: Poor Danny couldn't eat them because they have condensed milk in them.  Oops!


First of all, the recipe calls for brown sugar, butter, vanilla, flour, condensed milk, and mini chocolate chips.


Now, here's the thing about mini chocolate chips.  They are expensive and pretty much pointless unless you are using them for decorating.  As a substitute I take regular chocolate chips and chop them in my slap chopper.  They turn out just as small as the minis and even leave some chocolate "dust" that mix in really well with dough.


From here on out it is pretty easy.


Mix brown sugar and butter until fully incorporated...


...add vanilla and mix some more.


Add flour a cup at a time.


Mix until all of the brown sugar pieces are broken up into a fine dust.


Pour in the condensed milk, and mix until you get a consistent dough.


Stir in chocolate chips.


Cover and chill for at least one hour.  Dough will need to be very stiff.


When you are ready, using a teaspoon, scoop out a small amount of dough...


...and form into 1-inch balls.


Place them on a waxed paper lined cookie sheet.  Place them back in the fridge to chill until you are ready to dip them.


Meanwhile, put 1 cup of chocolate chips and 1 tsp of shortening into a microwave safe bowl.

Microwave on high in 30 second bursts.


Stir until smooth.


Drop each ball into the chocolate...


Using a candy fork, roll the balls around to coat completely.  Pick it up and let the excess drip off for just a second.  Don't let it sit for too long as the chocolate is warm and can cause the balls to lose their form.


Transfer the balls back onto a wax paper lined cookie sheet.


Let chill until set.  After they are set store them in an air tight container in the refrigerator.

Hope you enjoy these as much as my family did.  I know that my two year old enjoyed "painting" his face with them.


Ingredients:

1/2 cup salted butter, at room temperature
3/4 cup light brown sugar, packed
1 teaspoon vanilla extract
2 cups all-purpose flour
1 (14 ounce) can sweetened condensed milk
1 cup semi-sweet chocolate chips
1 cup of semi-sweet chocolate chips
1 tsp of shortening

Directions:

1. In a large bowl, use electric mixer to cream together butter and brown sugar. Add vanilla. Beat in flour, 1 cup at a time, until it is incorporated and you no longer see chunks of brown sugar (if you spot any, just squish them). Beat in sweetened condensed milk and mix until well-combined. Stir in 1 cup of chocolate chips.
2. Cover bowl and refrigerate until dough is firm (at least 1 hour- maybe more... you want the dough to be quite firm). Use a small cookie scoop or teaspoon to scoop out small amounts, roll into balls and place on a waxed paper-lined cookie sheet. Place all of the rolled balls back into the refrigerator until you are ready to dip them in chocolate.
3. Melt chocolate chips and shortening in the microwave in 30 second bursts, stirring after each heating time, until smooth. Use a candy fork or spoon to help you dip the chilled dough ball into the chocolate and roll it around to cover all sides. Place it on a waxed paper-lined platter.  Repeat with the rest of the dough balls. They'll begin to set pretty quickly. Keep them refrigerated until ready to serve.