Showing posts with label Dinner. Show all posts

Tuesday, May 14, 2013

Deep-Dish French Bread Pizza


Just like your average American family, my family loves pizza.  But I am going to let you in on a secret...that is not really a secret:  take-out pizza can get 1) boring, 2) expensive, and 3) detrimental to your wardrobe.

The great thing about pizza is that it is easy (at least the take-out kind), and a great option for long days where cooking dinner just doesn't sound so great.  This argument seemingly nixes my suggested alternative: Homemade Pizza.  But wait, not so fast.  Homemade pizza can be easy!  It is called French Bread Pizza.  You know those sandwich rolls you have in your cupboard?  Cut them in half, spread some pizza sauce on them, sprinkle cheese and toppings, and bake them.  Easy as making a sandwich!


Now, this option is great for the kids who only like one or two toppings on their pizza, but if you are anything like me, you love the combination of flavors multiple toppings provide.  With French Bread Pizza, multiple toppings can be tough.  They usually fall off, and that can get frustrating.  Well, I found a solution to all of your problems (at least as they pertain to French Bread Pizza).  It is called Deep Dish French Bread Pizza.  The process is just a couple more steps, but it takes virtually no time at all.


Instead of cutting the Roll in half, just cut the top 1/2" off.  Using a small serrated knife (i.e. steak knife) cut around the inside of the roll to loosen it up.


Hollow out the roll, leaving about 1/4" - 1/2" rim and crust all around.


Add the pizza sauce all the way around the edges, not just on the bottom.  This will add to the flavor greatly!


And then we layer!  Cheese, toppings, more cheese.  I even sprinkle garlic spread on top of mine to give it a bit of a kick!


Bake on 400°F for 8 minutes, or until it reaches your desired crunchiness.

So now your only argument is that your local pizza joint needs your business.  It is a fact, the take-out pizza industry is thriving.  It does NOT need your business.  Don't think you are supporting it with your weekly (or bi-weekly) purchase.  There!  I have now released you from your dependency on take-out pizza.  That is not to say you can't enjoy take-out from time to time, I do like Papa Murphy's, but that is a treat, not a regular meal!

Monday, January 30, 2012

Baked Lemon Shrimp and Beef


New is good.  Cooking the same old recipes week after week starts getting dull and can lead to snacking throughout the day.  I don't know about you, but when I snack I cannot get satisfied, so I tend to over indulge.  I also start falling back to REALLY basic and easy meals - we are talking boxed Mac & Cheese, Hot Dogs, and Top Ramen - and then my kids start to say "Not that again" a whole lot.  That, of course, is never a good sign.

Well, the cycle ends here!  This week I am going to post four "new to me" recipes as an incentive for me to get more creative in the kitchen.

So here comes the first one: Baked Lemon Shrimp and Beef.

I saw this one on Pinterest as just a picture and decided that I HAD to blog it, if only just to get a full recipe and article on the internet for it.

Last month my husband and I went to his Union's Christmas Dinner at The Sea Grill (a wonderful, fancy seafood restaurant in our town) and Todd ordered Steak & Shrimp.  The shrimp was prepared scampi-style and was amazing.  This got my appetite whetted for more shrimp dishes.

Then, as we were preparing our shopping list for Costco and trying to decide what to make for dinner I saw the picture, said "Good enough!", wrote down the ingredients, and headed out.


The original recipe called for only shrimp, lemon, butter, and Italian seasoning.  I, however, added stew meat (you can substitute thinly sliced beef of your choice) and garlic (not pictured, because I didn't add it to this batch but should have!).


Pre-heat the oven to 350° F.  Line a baking sheet with aluminum foil.


Slice up a couple of lemons.  I used only two lemons because I bought mine at Costco and they are HUGE there.


Place the lemons slices on the foil lined baking sheet.


Melt 1/2 cup (1 stick) of butter in the microwave.  It takes about 25 seconds in mine.


Drizzle the melted butter on the lemon slices.  Mince up two cloves of garlic and sprinkle that on the slices as well.


Place raw shrimp into a large bowl and toss with Italian seasoning.  While I used cooked tail-off shrimp (50-70/lb), that is not what I recommend.  Use raw tail-on shrimp (25-30/lb), they cook up more tender and juicy.


Arrange shrimp in a single layer in the middle of the pan on top of the lemon slices.


In a large bowl, toss beef cuts with 1 Tbsp of olive oil, 1 tsp of lemon juice, 2 tsp Italian seasoning.


Place the beef cuts on the inside perimeter of the pan.  Doesn't that just look pretty?!


Bake for 10-15 minutes, or until shrimp is opaque.  Serve over rice.

This was the very first time either of my sons ate shrimp and they loved it.


BAKED LEMON SHRIMP AND BEEF

1 lb raw, peeled, tail on shrimp (25-30/lb)
1/2 lb choice beef, sliced into thin strips
1/2 cup (1 stick) butter, melted
2-3 lemons, sliced
2 cloves garlic, minced
1 Tbsp + 2 tsp Italian seasoning
1 Tbsp olive oil
1 tsp lemon juice

1. Pre-heat the oven to 350° F.  Line a baking sheet with aluminum foil.
2. Place lemon slices on the baking sheet, drizzle with butter, and sprinkle with garlic.
3. In a large bowl, toss shrimp with 1 Tbsp of Italian seasoning, to coat.  Arrange shrimp in a single layer on top of the lemon slices in the middle of the baking sheet.
4. In another bowl, toss beef cuts with olive oil, lemon juice, and 2 tsp of Italian seasoning.  Place beef cuts on the inside perimeter of the baking sheet.
5. Bake for 10-15 minutes, or until shrimp is opaque.

Tuesday, December 6, 2011

Ham and Cheese Rolls


Prior to my marriage, which also means WAY before I had kids, every Sunday I would stop by the local bakery on my way to church and buy a Ham and Cheese Croissant.  It was a tradition that I really enjoyed and can look back on longingly.  Hot ham and cheese just give off a sense of comfort to me.

That being said, another comfort to me is baking.  I love parties because then I can bake and not have to keep the food in the house.  Whenever my turn comes around to savories though, I am usually at a loss.  My appetizers run a be exotic (and expensive) so this year I was determined to find a savory finger food that everyone would enjoy and would match my current budget.

This idea came in a round about way from a friends post on Pinterest.  I saw a recipe for pizza roll-ups (which I will do as well some day) and thought that Ham and Cheese sounded better.


So off to the store I went to buy what ever was on sale!  Yeah, I am that cheap sometimes.


I cut the Ham in to quarter strips...


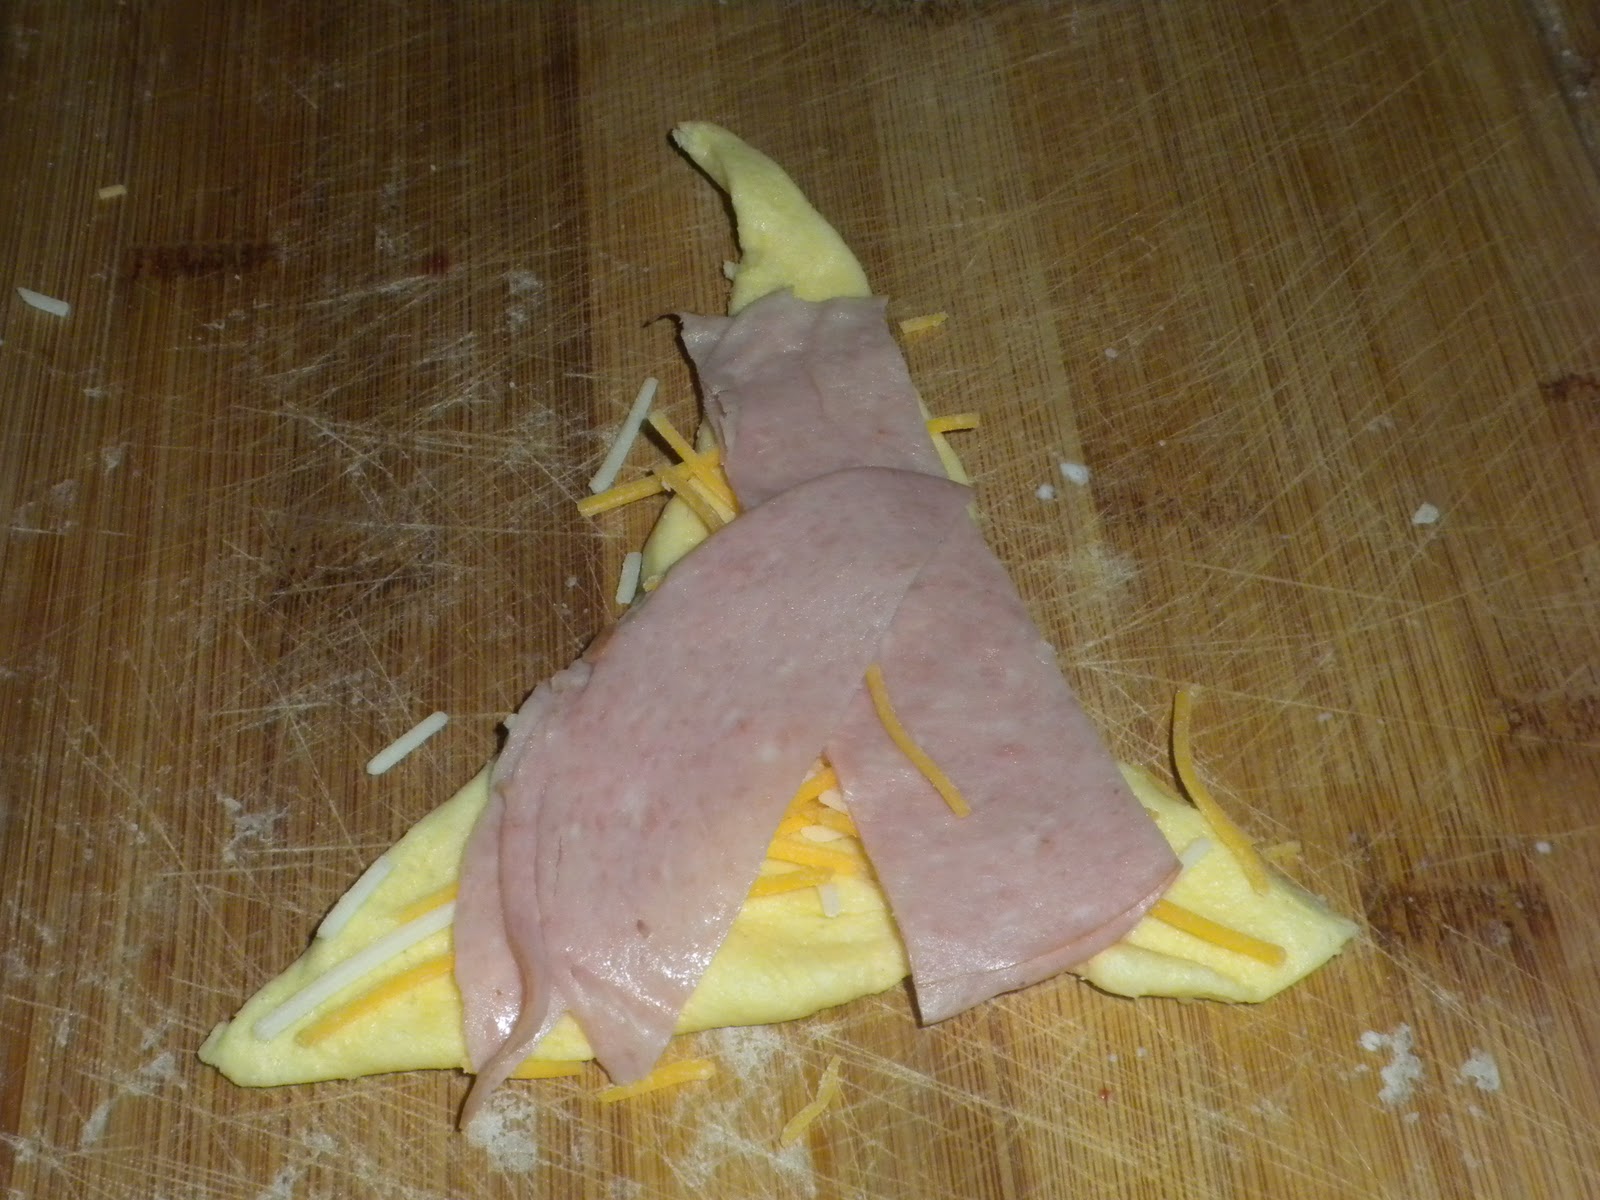
...unrolled the dough and sprinkled on some cheese.  I used the Triple Cheddar because, let's face it, Ham and Cheddar just go together.


I arranged the ham on the top to gain full coverage.  I started to use several strips of ham per roll, but in the end I realized that three strips in really all that is needed.


Roll the dough starting at the wide end.


It doesn't matter if some of the filling in hanging out.  That actually makes it look yummier.  Tuck the ends in a little to slightly curve the roll.


Arrange on an ungreased cookie sheet and bake for 10-12 minutes.

Serve these little babies hot or cold.  Both ways they are yummy!

Saturday, November 19, 2011

Cranberry Sauce


Aside from pumpkins, few other fruits and vegetables can claim as much prominence during the Holiday Season in America as cranberries.  Cranberries are one of three fruits native to America that are grown commercially (the blueberry and the Concord grape being the other two).  The name is derived from "craneberry" which is what the Pilgrims dubbed these wild berries because of their springtime blossom, which resembles a Sandhill crane.

Native Americans used the cranberry for not only food, but also clothing dye and a healing agent.  The Pilgrims and settlers to follow quickly adopted them as a staple in their diet and found them to be a useful bartering tool.*

Today cranberries are one of the most popular fruits the world over.  Unless you've been living under a rock since the 1990's you'll have noticed that cranberries are in everything.  Juices, trail mixes, salads, cookies, marinades, etc.  Their versatility is made greater by their shelf-life.  Fresh cranberries can be kept sealed and chilled for up to 3 months!  That's nothing to how long they will last frozen (18-24 months).  And, just in case you aren't convinced about cranberries as the ultimate super fruit, their health benefits have been lauded for years.  Cranberries contain bacteria-blocking compounds that are believed to be helpful in preventing urinary tract infections, and scientists now think this same function may be useful in blocking the bacteria responsible for ulcers and certain oral bacteria that can lead to gum disease.**

Now let's get down to some really important business.  Cranberry sauce.  While some people are fine with buying cranberry sauce in a can, more and more people are turning to the do it yourself approach.  A couple years ago I made some homemade cranberry sauce, but was disappointed with the result.  The sauce contained too many other flavors that over powered the desired tang that cranberries provide.  I found myself asking why I couldn't make a sauce that tasted just like the stuff in a can.  Well this year the recipe practically slapped me in the face.


Yup, that's right.  Three ingredients.  Water, Sugar, Cranberries.  DUH!

After feeling foolish for bit I went out and bought the cranberries, came home and started the process of making what would turn out to be the perfect cranberry sauce.


First you mix 1 cup of water and 1 cup of sugar in a medium sauce pan.  I doubled the recipe because I made this batch for a pot luck.  Stir until the sugar is dissolved.  Bring to a boil.


Add a 12 oz package of fresh cranberries to the pan, bring to a boil, reduce heat and lightly boil for 10 minutes.


Remove from heat.  As you notice there is a film on top of the sauce.  Skim this immediately.  Trust me, the longer you wait, the harder it will be to skim the film.


Once the film has been skimmed, let the sauce sit until it is room temperature.  This process takes about 4-6 hours (longer if you made a double batch like I did).


Now that the sauce is room temperature, transfer to a serving dish, cover with plastic wrap and chill overnight.  Wow!  That was easy!

Hope you guys enjoy making (and eating) this sauce as much as I did!

*Cape Cod Cranberry Growers' Association (http://www.cranberries.org/cranberries/history.html)
**Cape Cod Cranberry Growers' Association (http://www.cranberries.org/cranberries/health.html)

Thursday, November 17, 2011

Bread Machine Dinner Rolls


If your family is anything like mine, bread rolls aren't just a nice thing to have at the Thanksgiving Table, they are a necessity.  Every year we always got the exact same rolls from a popular bakery in town.  But one year that bakery didn't carry those rolls anymore.  The ones we got instead were good, but they just weren't the same.

That just happened to be the year my oldest son was born and the first year my FIL and BIL came down for Thanksgiving.  With them they brought my FIL's old Bread Machine.


I spent the next year investigating recipes for the bread machine.  Through my research I discovered a likely recipe and modified it slightly.  The following Thanksgiving most of my family went to Las Vegas to celebrate with my Uncle and his family.  So, for the first time ever, I was in charge of all of the food for Thanksgiving Dinner.  I took a chance and made these rolls for the dinner.  My FIL loved them so much I even made him an extra batch for the drive home.  

The next year I made them for Thanksgiving again, and have done so every year ever since.  Over the years I have added cheese and/or Jalapenos to the recipe to add a bit of a twist, but the original is still a favorite request.

This year I wasn't going to make the rolls, as I am still recovering from surgery, but a couple days ago I started to feel guilty.  This is MY thing.  I HAVE to do this, otherwise I'll never get back to "normal".  So I improvised.


I have always been a fan of making pre-mixes.  I make them for everything you can think of:  cookies, biscuits, pancakes, waffles, muffins...the list goes on and on.  So a few days ago I put together several bags of pre-mixes for the bread rolls.  I just put all of the dry ingredients (save the yeast) in gallon Ziploc bags.

Next, when I was ready to make a batch of rolls, I dumped the bag in to the bread machine pan, added the rest of the ingredients and set the machine for the dough cycle.  This cycle is 90 minutes long, so you have a bit of time to get things done before you are needed again.

After the dough cycle is done you'll need to take the pan out of the machine, punch down the dough and turn in out onto a lightly floured surface.  Excessive kneading is not necessary.


At this point, let the dough sit for a minute.  While this is happening take out a baking sheet and grease it.


Yes, I use Pam.  I love Pam.  Pam is awesome.  Now that that is off my chest...  Once the dough has set for that minute, using a kitchen knife, cut the dough into twelve equal portions.


Roll each of the pieces into round balls and place them on the greased pan.


Cover with a damp towel and let rise for 30-60 minutes in a warm place.


I have a neat little corner on my kitchen counter where I keep a space heater and that I use to rise all of my bread.

While the rolls are rising, mix together egg white and water for the glaze.  Also, this would be a good time to preheat the oven.


Bake the rolls for 10-12 minutes.  At this point you can serve them warm, or if you are like me, making them ahead of time, let them cool completely before placing them in a Ziploc bag and freezing them.

When you are ready to bake them for dinner, place the frozen rolls on a baking sheet.  Preheat the oven to 350 degrees and bake them for 10 minutes.

Ingredients:
3 cups flour
3 Tbsp white sugar
1 tsp salt
1/4 cup dry milk

1 cup warm water
2 Tbsp butter, softened
1 pkg (2 1/4 tsp) dry yeast

1 egg white
2 Tbsp water

Directions:
1. Place first 7 ingredients in Bread Machine.  Set on Dough Cycle.
2. Remove risen dough from machine, deflate, and turn onto floured surface.  
3. Divide into 12 equal pieces.  Form into rounds.  Place rounds onto greased baking sheets.  Cover with a damp cloth and let rise until doubled.
4. Preheat oven to 350 degrees (F).
5. Glaze risen rolls with mixture of egg white and water.  Bake for 10-12 minutes or until golden brown.