Showing posts with label Crafts. Show all posts

Thursday, May 9, 2013

Napkin Roses for Mother's Day


I had the huge honor of teaching Sunday School for several years at Grace Baptist Church in Eureka, CA.  I still miss the kids there very much.  They challenged me to find different ways to challenge them every week. It wasn't just about learning the Bible.  It was about applying those lessons to everyday and helping them to become witnesses to the World.

Of all of the lessons I taught, I only repeated one.  This lesson I repeated every year on Mother's Day.  The lesson changed from year to year in content, but the basis was the same:  Finding Ways to Celebrate Mom.  The Bible tells us to "Honor your father and your mother so that you may live long in the land the LORD your God is giving you." (Exodus 20:15).  This is the fifth of the Ten Commandments of God.

God gave us a lot of rules in the Bible, but for Him to have made "Honor your father and your mother" one of the Ten Commandments, and for it to be the first of the Commandments that have a promise attached to it  - well, it stands out.  Our parents came before us.  They learned lessons ahead of us so they could teach us and we (hopefully) won't need to learn the same lessons the same ways they did.  This is a fact that demands respect.

In America we set aside one day a year to celebrate our Mother (Fathers get their own day in June, but this isn't about them).  I want to make it very clear that "celebrating" them should not be confused with "honoring" them.  We should "honor" them (as a person) everyday.  We don't need a special day to do that.  No, Mother's Day is about celebrating her "mom-ness".  What makes her a great mom?  Why did God give you the mom He did?  It is a day to thank her for being your mom, and apologize for forgetting to thank her every other day of the year.

To go along with the lesson I always included the same object lesson/craft:  the Napkin Rose.  This is a very simple craft, but it means so much when the meaning behind it is explained.

Pretty much everyone knows that flowers have meanings.  Colors matter in conveying the message you want to deliver.  Yellow rose = friendship, pink rose = puppy love or infatuation, red rose = passionate love.  However, on Mother's Day, two of these colors take on a different meaning.

I learned this lesson as a young adult, attending a Mother's Day brunch at the Elks Lodge.  My father presented my mother and my grandmother with two different colored roses.  My mother wore a red rose on her blouse, my grandmother wore a white rose.  I leaned over and asked my mom why my father got her a red rose when her favorite color was yellow.  My grandmother was the one who answered.  "Your mother wears a red rose today because the mother she honors is still here on Earth.  I wear a white rose because my mother is no longer here."  

Those words struck me then, and then struck me even harder several years later when I gave my mother her first white rose on the day I wore my first red rose.  It was my first Mother's Day, and her first Mother's Day without her mother.  That was also the first year I presented this Object Lesson.

I found the idea on You Tube (ironically it was a video of a guy trying to impress girls by making roses out of cocktail napkins, but hey, whatever works).
 
 
 Literally all you need is a red or white napkin (cocktail napkins work best) and tape (floral tape works best).


Lay the napkin out flat and tightly roll one entire edge between your fingers.  Only roll about 1/8 of an inch worth.  Just enough to give it a "curled" look.


Flipping the napkin over, roll the napkin into a loose pinwheel tube.  Make sure the rolled edge is rolling out and not in.


Pinch the tube about two inches from the top and start a tight twist all the way down to create the stem.


Wrap the stem in floral tape.  Pull the petals slightly to open up the rose, and - Viola! - you have yourself a Napkin Rose ready to give to your mother (or grandmother, aunt or mother-figure in your life).


Friday, December 2, 2011

Paper Chain Garland


I know that every one in the world who ever went through Kindergarten has made a paper chain.  To me, they signify Christmas in a house that any child between 4-10 lives.  As I write this I am looking at the chain I made with my sons and I can't help but smile.  I think about the Christmas movie playing in the background (I'm pretty sure it was "The Year Without A Santa Claus") and the questions my oldest son would ask as he drew pictures of bugs and imaginary friends on his strips of paper.  It will be an indelible memory set in my mind by the magic of the Season.  I have been waiting for 4 years for the year that I could make Christmas decorations with my children.  I find that it was definitely worth the wait.

So how do you make a paper chain?  I know you only ask to be nice.  So I will reward your kindness with an answer.


First you pick out your choice colors of construction paper.  You don't have to stick with red, green, and white.  These are just my choice colors.  The beauty of the paper chain is that it is festive in all of it's many manifestations.


Second, you fold the paper (three at a time) in half width wise (landscape, for all of you artists our there), and you cut.


Third, you fold the paper, accordion style, in thirds.  You can fold it in fourths if you desire, I chose thirds for artistic reasons.


...and you cut.


Remove the white strips.  Here comes the artistic reasoning behind my previous decision.


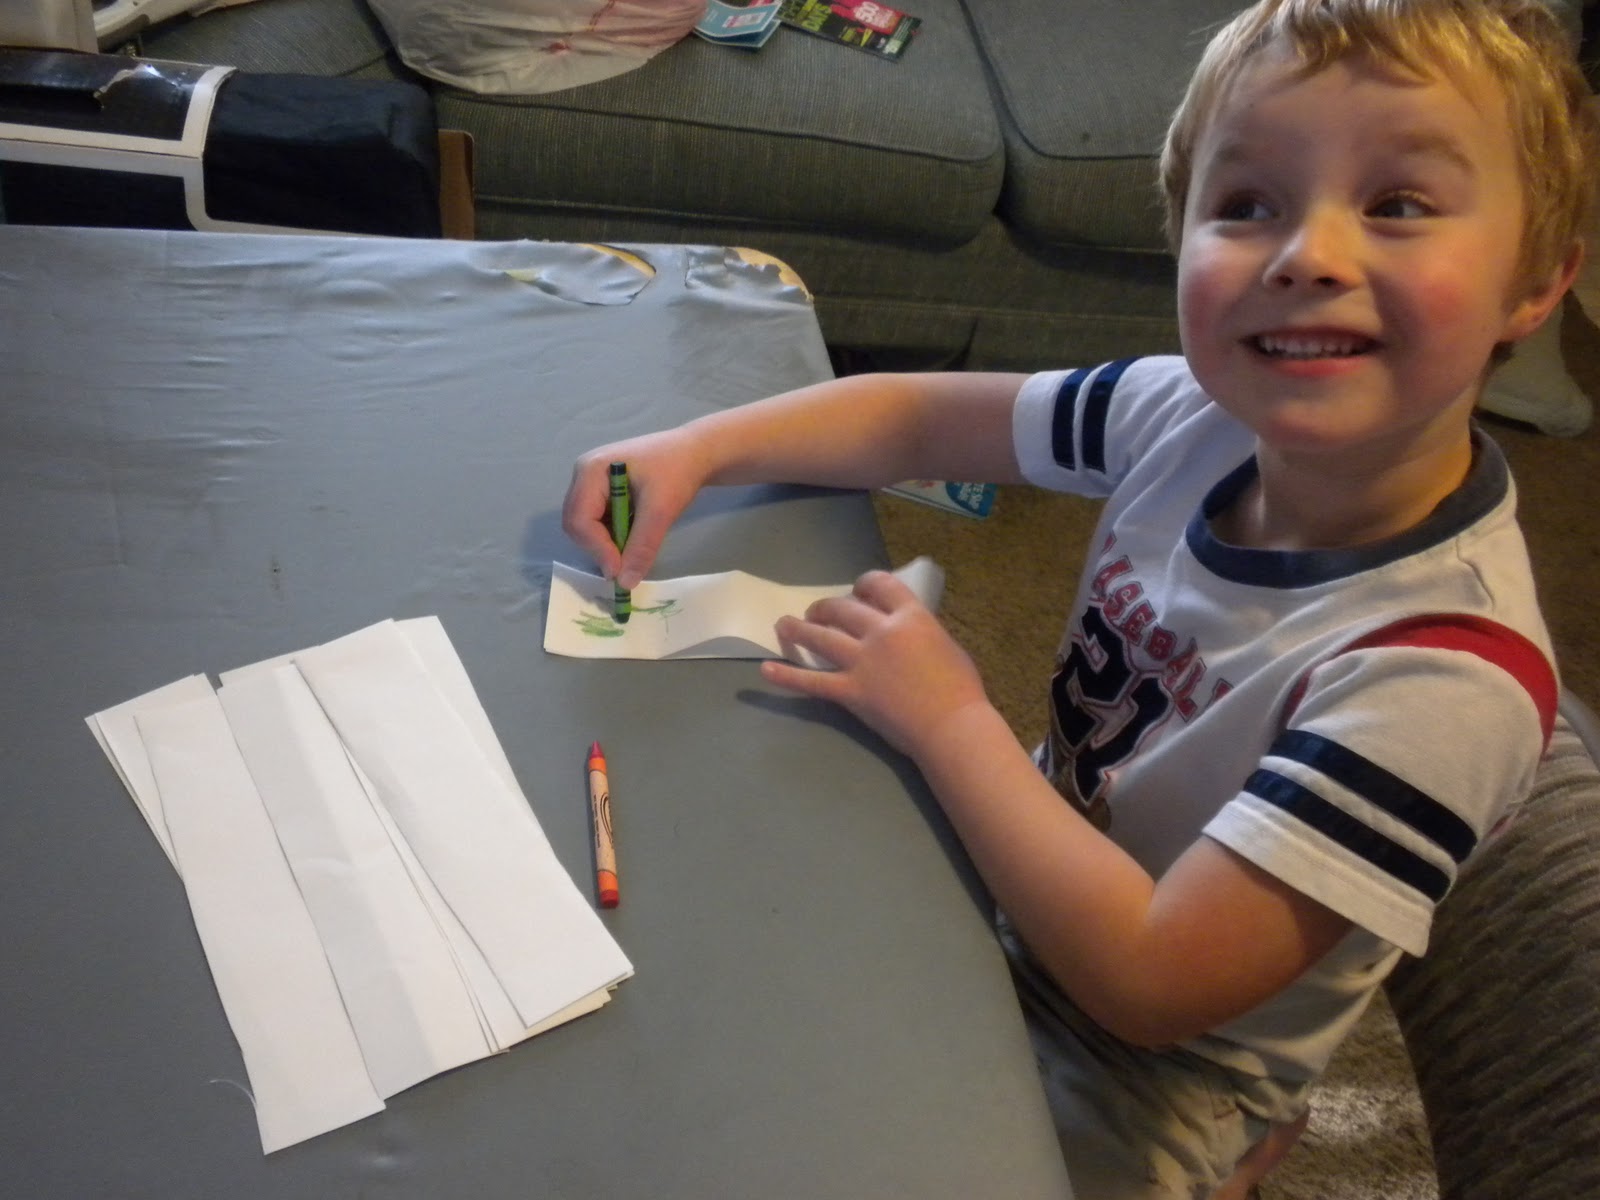
Have your children color the white strips however they would choose.  I told my sons the more color the better.


Even my two year old got into the coloring.


When you are ready to assemble "fold" a strip in to a ring and staple it.  Then string another strip through the ring and staple that one too.  Continue until your chain reaches your desired length.


Lastly, find the perfect location and hang your creation for all the world to see (or at least those that you invite into your home).   

Advent Calendars

Advent Calendar using the windows of Town Hall in the city of Hünfeld, Germany.
One of my favorite Christmas Traditions is the Advent Calendar.  I cannot remember a Christmas while I was growing up that we did not have an Advent Calendar to count down the days in December leading up to Christmas.  Two years ago, when my oldest son was two, we decided it was time to start the tradition with him.  My mother bought him a store bought Advent Calendar with chocolate pieces in the shape of Christmas items.  It was quite a special event.


Now, before I go in to any more of my own family traditions, I want to explain a few things about Advent and Advent Calendars.  Seeing as I am a history buff, you guys had to see that one coming.

While no one can pin point an exact beginning to the celebration of Advent (which is derived from the Latin word Adventus meaning "coming") there are many clues that allow us to block in a time period.  We know that Advent was not celebrated before the feast of the Nativity of Our Lord was established in the late 4th century, which marks the end of the Liturgical Year for Western (Catholic) Churches.  It was not until 590 that a Synod established a series of Lenten rite days from November 11th until the Nativity feast.  It was under Pope Gregory the Great (590-604) that we see the first mention of Advent (a reference to the Second Sunday of the Advent) and by 650 the Spanish were celebrating Advent five Sundays at a time.  During the reign of Pope Gregory II (1073-1075) the number of days was officially reduced to the four Sundays prior to Christmas.* 

The Season of Advent is used to commemorate waiting and preparing.  Both the waiting of the Hebrews for their Messiah and the preparing of Christians for the Second Coming of Christ.

Now, ironically, Advent Calendars have very little to do with Advent itself.  Traditional Advent Calendars begin on December 1, regardless of when the Season of Advent actually begins (which is the fourth Sunday prior to Christmas - as early as November 27th).  The origins of the Advent Calendar can be traced to German Lutherans, as far back as the early 19th century, physically marking the days of December until Christmas.  The first evidence of an actual Advent Calendar was a Handmade Calendar in 1851.  The first printed Advent Calendar was produced sometime between 1902-1908.**

Okay, that was as brief a history as you will ever get from me.  Much of the history of the Advent Calendar explains my own family's use of it.  My father was raised a Lutheran and many of my mother's ancestors are German Immigrants.

Now, let me tell you what I think of store bought Advent Calendars.  I can say this without fear of insulting my parents because they have known for years what I think about the store bought variety: the chocolate tastes like plastic!!

So last year I decided that if my children were going to participate in this Family Tradition, I was going to make sure they got good chocolate.  I also wanted to make sure they got a good sense of what the season was really about.

I made my own Wall Quilt Advent Calendar.  You can pretty much use anything.  I have a friend who bought 24 mini stockings and hangs them on the wall.  Then you can put what ever kind of candy you want in them.  (I of course use Hershey Kisses.)  


Now, some where in the celebration of Christmas, Christ has been taken out of it.  Most celebrations anymore are purely Secular, revolving more around Santa Claus than Christ.  Don't get me wrong, I love Santa Claus.  St. Nicholas was a real man, who loved the Lord very much and his deeds in the name of the Lord are known far and wide.  However, it was not St. Nicholas, a Greek monk, that gave us reason to celebrate this Season.

To help my children understand why we celebrate Christmas, I decided to incorporate the Nativity Story in our Advent Calendar.  


Starting with the Angel Gabriel's visit to Mary and her visit to Elizabeth (Luke 1:26-55), we spend the first 12 days of December relating the Story of how Jesus' birth was foretold to Mary, who was a teenager and not yet married to her promised husband, Joseph.

We then jump to The Nativity Story (Luke 2:1-14) to spend the 12 days leading up to Christmas discussing the modesty that surrounded the Savior's birth.  Of all things we must never forget that the Hebrews were waiting for a King to come in and slaughter the Romans and reclaim the land for Israel.  They were not expecting a girl of modest means to birth their King in a stable.  We are presented a picture of true sacrifice from beginning to end.

We, as a family, make sure that the Advent Calendar is hung is a place of prominence in our house so that we will be reminded every day that it is up that we are learning of the true meaning of the Season.  The sacrifice of Mary and Joseph, the sacrifice of Jesus (the Man), and the sacrifice of God.  All of these sacrifices were for our redemption.

Kind of humbling, don't you think?

Monday, November 21, 2011

Kiddie Fun Badges


Today, while my sons and I were visiting my mom at her office, a co-worker gave each of the boys a little token gift...a retractable ID Badge holder.  You would have thought she handed them a gold nugget judging by how excited they were.  My boys love little do-hickeys like that.  When they saw that my mom had one too, but her's had an ID Badge on it, they also wanted an ID Badge.

Now, for any one who hasn't met my oldest son, for months he has been telling more and more elaborate stories of his place of work (Down Below), its ever changing location (I think it currently is located in space), and what he does there (play games, create stuff, build stuff for Disneyland, etc).  I figured making ID Badges for them would be a fun and imaginative way to keep the stories coming.  I was right!


So the first thing I did was open up a file in Microsoft Publisher.  I love this program.  I make party invitations, cards, and all sorts of picture related stuff with this marvelous program.  I created a 3x5 document, inserted a head shot picture of whichever child, added a fake name, a funny title, and a funny company name.  I repeated this for the second child, then cut and pasted both to a 8-1/2x11 document.


I printed the document on card stock.


Next, I cut each of the badges out, save the slot at the top.


For laminating, I use clear packing tape.  It is cheap and works just as well as the more expensive, heartier laminating sleeves professionals use.  After all this is just for play.


Using an X-acto knife, cut out the top slot for hanging the badge.  Reinforce the top of the slot with tape across the outer edge.


Last, but not least, I attached the badge to the holder and pinned it to my son's shirt.  He was so excited it took me three minutes of picture taking to get one shot that he wasn't jumping up and down in.

Friday, November 18, 2011

Calming Jars

I have a confession...I am the mother of wild children.  Okay, this might not be that huge of a confession.  In fact, it isn't really much of a secret.  All of my friends and family know about my boys' dispositions.  They are not bad children, just extremely passionate about everything they do.  This often leads to over wrought nerves and REALLY BIG tantrums.

My husband and I have tried all sorts of disciplinary tactics.  Some work, others don't, but none of them really reached the heart of the matter...the boys need to CALM DOWN!  Have you every tried to discipline an hysterical child?  Are they really learning anything?

Yesterday a friend of mine posted on Facebook that she had made her daughter, who is a year older than my youngest son, a Calming Jar.  In the post someone asked her what it was and she explained.  To me, a nerve-frayed mother looking for a solution, this was pure GOLD!  I looked up the directions on Pinterest (my current addiction) and informed my sons we were going on an "Inspiration Expedition" to the craft stores.


These are all of the supplies you need (water too).  Seriously, all you need is a bottle or jar (12-16 oz), water, glitter glue, extra fine glitter, food coloring, and duct tape (or something else to seal the cap of the container nice and tight).


I chose to use a 12 oz soda bottle because they were plastic and on sale.  I, of course, had to make a great sacrifice by drinking a couple of these babies to get my empty bottles, but what can I say, I am a slave to my art.


After the bottle was emptied and rinsed I filled it with 12 oz of water.


My son then was able to help by emptying two tubes (about 1 1/2 Tbsp) of glitter glue into the bottle.  Glitter glue (found in the kids craft section of your local craft store) is necessary, as other glues are not thick enough to achieve the desired effect of this project.


Next he added his preferred food coloring to the bottle.


Next I helped him add 1/2 an ounce of extra fine glitter.  The heavier glitter sinks to the bottom too fast for the purpose of this project.


Next I capped the bottle, shook it until all of the glitter and glue were mixed evenly and the glitter swirled around in a "storm-like" fashion.  At this point I sealed the cap.  I used black designer Duck Tape because I thought it added a nice touch to the project and was a lot less messy than using super glue or rubber cement.


Then I gave the bottle to my son and told him to shake it up as good as he could and then watch it until all of the glitter stopped moving.  I timed the bottle while he was doing this.  His bottle took about 3 minutes to settle.  The desired time is 3-5 minutes.

The purpose of this bottle is for the child to imagine that the glitter in the bottle are all of his thoughts.  As the glitter settles so do his thoughts.  After the bottle is settled then he should be ready to speak with you about what happened, or what's bothering him, or why he did what he did.

This purpose is easier to achieve with an older child, but my 2-year old is mesmerized by the glitter and usually stops crying long enough to shake the bottle and stare at it.