Showing posts with label Christmas. Show all posts

Sunday, May 5, 2013

Greetings from Salem!

Wow!  Who knew that moving would take so much out of me that I would need to take an 8-month hiatus from blogging?  Well, to celebrate making it back to blogging, I have changed the look of the blog.

Our lives have been very eventful in the last eight months.  Here are a few high lights, month-by-month:

September - We arrived to fairly hot weather and were able to get some awesome family time in before Todd started his job and AJ started his new school.  Gordon and Scott (the FIL and BIL) helped us move and stayed one extra day.  The day they left my parents arrived to visit.  Two days after they left Chad and Jamie (BIL and SIL) arrived to visit.  What a wonderful time!


October - Todd started work, AJ started school, Gordy and I decided to "get lost" a lot in order to find our way around town without depending on GPS.  It only took us two weeks to stop using it.  Halloween was fun (the boys were Mario and Luigi) and we were able to sneak a trip down to Eureka to celebrate Ti Aula's birthday.


November - More adventures around town.  The leaves turned, so we were able to have some fun in the leaves.  Rain toward the end of the month provided Todd with his first challenge as a carrier: delivering mail in a flood.  Was able to host Thanksgiving with most of Todd's family (missed MIL).


December - Busiest month of the year!  I decided to bake goodies for Todd's co-workers 2-3 times a week, and apparently they liked them.  My parents surprised me by visiting the weekend before my birthday.  I cried like a baby (we are talking huge sobs) when I opened the door and saw them standing there.  The in-laws were here for Christmas and then a week later we traveled to Eureka to celebrate with my family.


January - The New Year was rung in while visiting family in Eureka.  After returning home the rest of the month was spent settling in to a routine and enjoying life.  Mommy and Gordy spent a lot of time at the YMCA and the biggest excitement of the month was the "new" bunk bed Daddy found while at work for $25.


February - Being a short month, it flew by very fast.  Uncle Scott and Mike and Justin all sneaked in visits at the beginning of the month, and the boys got to spend a bit of time at the Discovery Village.


March - This month was packed VERY full.  Between a quick trip to California for my niece's birthday, Easter, another visit from Mike and Justin, and AJ being invited to TWO birthday parties we were busy every weekend.


April - Finally, last month opened with a BANG!  AJ turned 6 and my parents surprised him with a special visit.  We celebrated all weekend by doing some of his favorite things and ended it with a party at his favorite pizza restaurant.  The rest of the month zoomed by.  As the temperatures started to rise we spent more time out of doors.  It culminated with a visit from our cousins, a trip to the Ag Fair, and a case of pneumonia for AJ.  Not the ending we would have chosen, but he is doing much better now.

Monday, December 5, 2011

M&M Sugar Cookies


I know I am not the only mom that runs into this issue.  You go to the grocery store and walk by the bakery section and you hear your kids start chanting "Cookies!  Cookies!  Cookies!".  If your kids are anything like my sons, when you finally relent and take them to pick out a cookie, their choice is usually whatever has the most candy on it.  The cookie of choice for my sons is hands down M&M Cookies.

In the past I have attempted to replicate these cookies to little success.  It wasn't until recently that my 4 year old actually gave me the idea on how to manage it.  I was making sugar cookies to decorate and my son looked at me and said "These would be really good with M&M's."  The light practically blinded me, it went on so fast.


Now, my advise to you is find your favorite sugar cookie recipe and use that.  As I was working on a limited time frame, I bought the Pillsbury Sugar Cookie dough.


After preheating the oven, roll the dough into 1-inch balls and place on an ungreased cookie sheet 2 inches apart.


Bake cookies for 8 minutes.  This will allow the cookies to flatten slightly and give you more space to place the optimal amount of M&M's.  According to my son, M&M's are the whole point of this cookie.


Bake for an additional 5 minutes.  Let the cookies cool slightly on the tray before transferring to a wire rack.  Cool completely and store in an air tight container.

These cookies came out a little crispier than I would have liked, but using your favorite sugar cookie recipe will help you adjust for preference.

Sunday, December 4, 2011

White Christmas Dream Drops


My husband is not a sweet eater.  I have known this since the first time we met.  Growing up he was not allowed to eat much candy, so as an adult he eschews candy for other "bad for you" vices...like bread and chips!

So, obviously, when my husband requests that I make a cookie I move heaven and earth to do it for him. I am being sarcastic, but this was almost my response when he texted me a picture of some cookies a co-worker had made with a request that I make them for Thanksgiving.  Had it not been the day before Thanksgiving - and there was NO WAY I was going back to the store that day - I would have gladly obliged.

So a week later, after all of the desserts from Thanksgiving had worn off, I pulled out the recipe and decided to give it a go.


First of all, like all meringues, the recipe starts with whipping egg whites and cream of tarter with an electric mixer.  I use my Kitchen aid to save my arm.  When soft peaks begin to form, you add vanilla and salt.  Turn the speed to high and start adding sugar one tablespoon at a time, waiting 15 seconds between additions.


After the last addition, scrape the bowl and beat for 15 seconds longer.  At this point the peaks should stand up straight when you lift the beater.  Using a flexible spatula, fold in white chocolate chips and crushed peppermint candies.


Now let me explain something very important here.  Crush the candies BEFORE you start the meringues.  I know this sounds like a no brainer, but I made this mistake and nearly ruined the meringues by letting condensation build up and soften the peaks.

Now, place several starlight mints in a plastic bag and, using a rolling pin, take out your frustrations.  Very therapeutic!


I do recommend taking them outside and beating them on the sidewalk.  Lay down some newspaper to keep the sidewalk from tearing the bag.


Once you have folded the chocolate and mints into the meringues, drop spoonfuls on to two parchment lined trays.  Sprinkle some more crushed peppermint onto the top of the drops.  Bake on 250 degrees for 30-35 minutes.


Half way through the baking switch tray positions.  Once the meringues are completely dry on the outside, turn off the oven, open the door and let the drops sit for 10 minutes.  Let them cool completely on the trays.

These cookies are crispy on the outside, just like traditional meringues, but are delightfully chewy in the center.  Bon Appetite!

2 large egg whites, at room temperature
1/8 tsp cream of tartar
1/2 tsp vanilla extract
1/8 tsp salt
3/4 cup sugar
1 cup white chocolate chips
1/3 cup plus 1 1/2 Tbsp coarsely crushed peppermint candies

1. Preheat oven to 250 degrees.  Beat egg whites and cream of tartar in a deep bowl with a mixer, using a whisk attachment, just until soft peaks form.  Add vanilla and salt.  While speed is set to high, pour in sugar 1 Tbsp at a time, waiting 15 seconds between each addition.  Scrape the bowl and beat for an additional 15 seconds.  At this point the meringue should form straight peaks when the beater is lifted.  Fold in chocolate and 1/3 cup candies with a flexible spatula.

2. Line 2 baking sheets with parchment paper, using a bit of meringue at the corners to hold the paper down.  Using a couple spoons, drop meringues in rounded tablespoonfuls slightly apart onto the sheets.  Sprinkle with remaining candies.

3. Bake until meringues feel dry to the touch, but are still pale, 30-35 minutes.  Switch pan positions halfway through.  Turn off the oven, open the door, and let cookies stand for 10 minutes.  Let cool on pans.

Makes about 32 cookies.

Store air tight 2-3 days.

Friday, December 2, 2011

Paper Chain Garland


I know that every one in the world who ever went through Kindergarten has made a paper chain.  To me, they signify Christmas in a house that any child between 4-10 lives.  As I write this I am looking at the chain I made with my sons and I can't help but smile.  I think about the Christmas movie playing in the background (I'm pretty sure it was "The Year Without A Santa Claus") and the questions my oldest son would ask as he drew pictures of bugs and imaginary friends on his strips of paper.  It will be an indelible memory set in my mind by the magic of the Season.  I have been waiting for 4 years for the year that I could make Christmas decorations with my children.  I find that it was definitely worth the wait.

So how do you make a paper chain?  I know you only ask to be nice.  So I will reward your kindness with an answer.


First you pick out your choice colors of construction paper.  You don't have to stick with red, green, and white.  These are just my choice colors.  The beauty of the paper chain is that it is festive in all of it's many manifestations.


Second, you fold the paper (three at a time) in half width wise (landscape, for all of you artists our there), and you cut.


Third, you fold the paper, accordion style, in thirds.  You can fold it in fourths if you desire, I chose thirds for artistic reasons.


...and you cut.


Remove the white strips.  Here comes the artistic reasoning behind my previous decision.


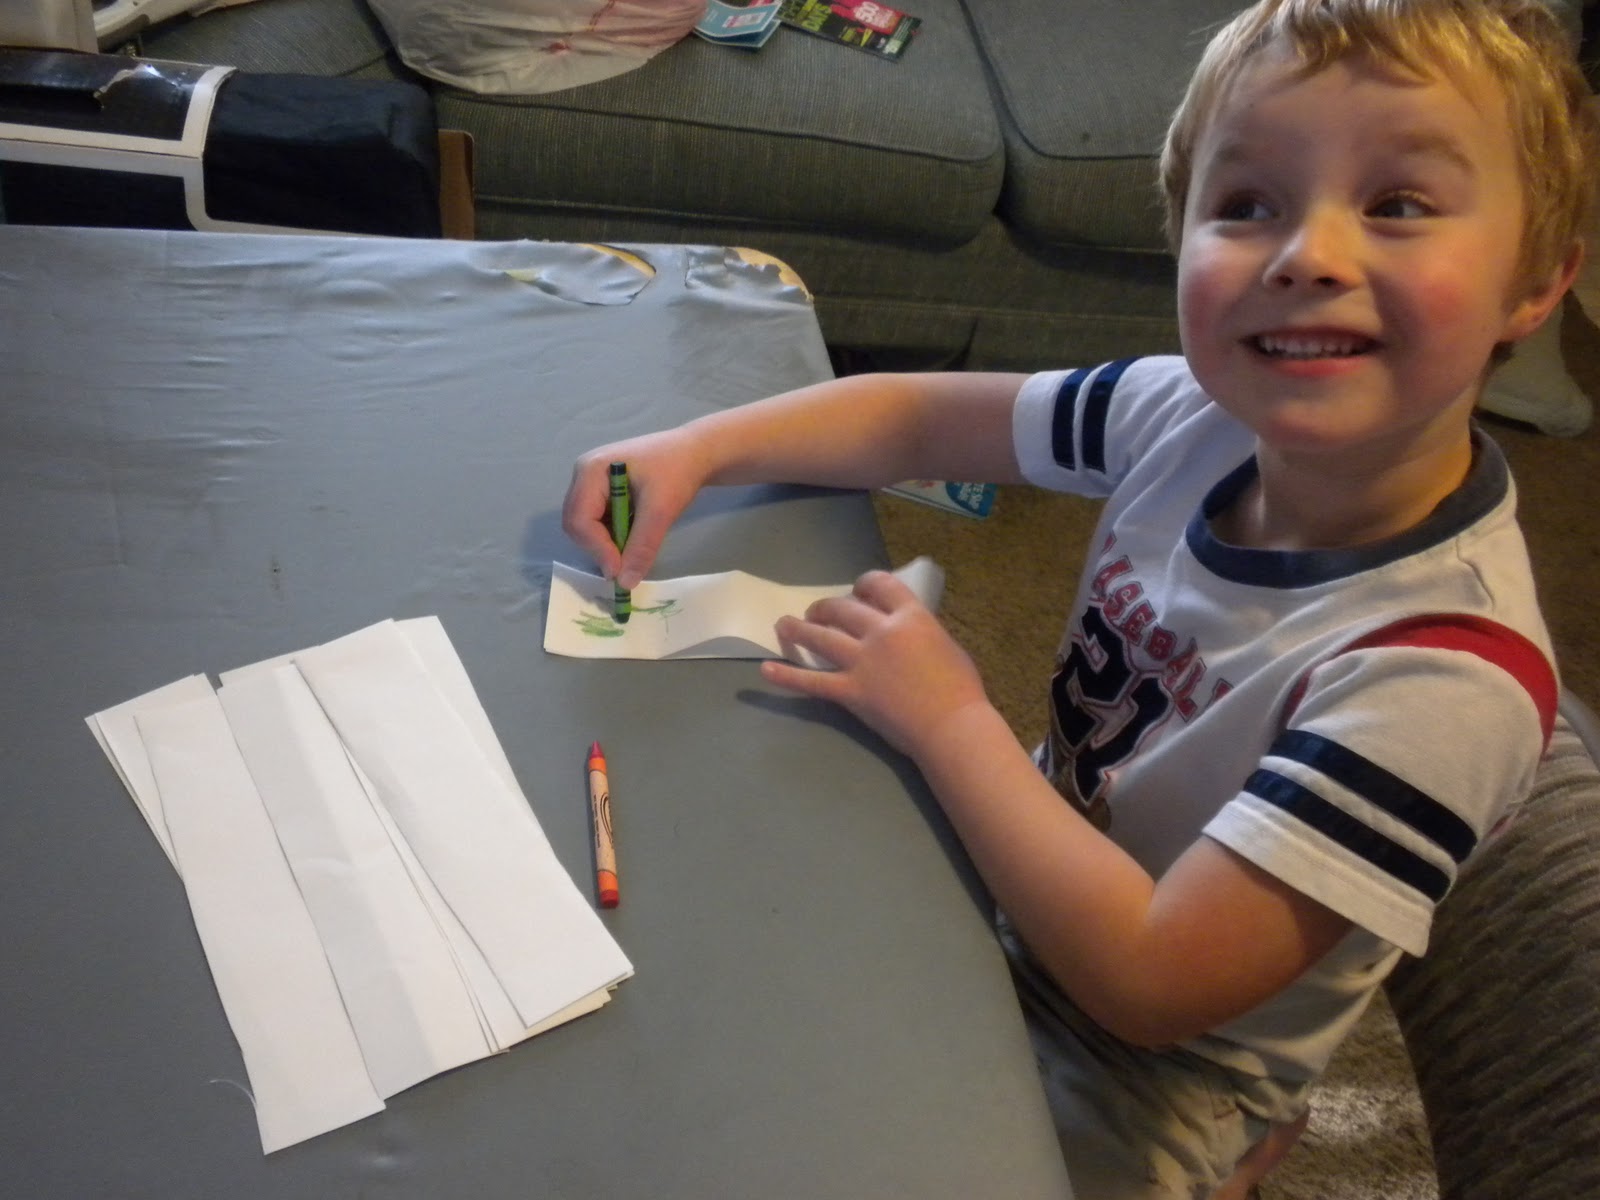
Have your children color the white strips however they would choose.  I told my sons the more color the better.


Even my two year old got into the coloring.


When you are ready to assemble "fold" a strip in to a ring and staple it.  Then string another strip through the ring and staple that one too.  Continue until your chain reaches your desired length.


Lastly, find the perfect location and hang your creation for all the world to see (or at least those that you invite into your home).   

Advent Calendars

Advent Calendar using the windows of Town Hall in the city of Hünfeld, Germany.
One of my favorite Christmas Traditions is the Advent Calendar.  I cannot remember a Christmas while I was growing up that we did not have an Advent Calendar to count down the days in December leading up to Christmas.  Two years ago, when my oldest son was two, we decided it was time to start the tradition with him.  My mother bought him a store bought Advent Calendar with chocolate pieces in the shape of Christmas items.  It was quite a special event.


Now, before I go in to any more of my own family traditions, I want to explain a few things about Advent and Advent Calendars.  Seeing as I am a history buff, you guys had to see that one coming.

While no one can pin point an exact beginning to the celebration of Advent (which is derived from the Latin word Adventus meaning "coming") there are many clues that allow us to block in a time period.  We know that Advent was not celebrated before the feast of the Nativity of Our Lord was established in the late 4th century, which marks the end of the Liturgical Year for Western (Catholic) Churches.  It was not until 590 that a Synod established a series of Lenten rite days from November 11th until the Nativity feast.  It was under Pope Gregory the Great (590-604) that we see the first mention of Advent (a reference to the Second Sunday of the Advent) and by 650 the Spanish were celebrating Advent five Sundays at a time.  During the reign of Pope Gregory II (1073-1075) the number of days was officially reduced to the four Sundays prior to Christmas.* 

The Season of Advent is used to commemorate waiting and preparing.  Both the waiting of the Hebrews for their Messiah and the preparing of Christians for the Second Coming of Christ.

Now, ironically, Advent Calendars have very little to do with Advent itself.  Traditional Advent Calendars begin on December 1, regardless of when the Season of Advent actually begins (which is the fourth Sunday prior to Christmas - as early as November 27th).  The origins of the Advent Calendar can be traced to German Lutherans, as far back as the early 19th century, physically marking the days of December until Christmas.  The first evidence of an actual Advent Calendar was a Handmade Calendar in 1851.  The first printed Advent Calendar was produced sometime between 1902-1908.**

Okay, that was as brief a history as you will ever get from me.  Much of the history of the Advent Calendar explains my own family's use of it.  My father was raised a Lutheran and many of my mother's ancestors are German Immigrants.

Now, let me tell you what I think of store bought Advent Calendars.  I can say this without fear of insulting my parents because they have known for years what I think about the store bought variety: the chocolate tastes like plastic!!

So last year I decided that if my children were going to participate in this Family Tradition, I was going to make sure they got good chocolate.  I also wanted to make sure they got a good sense of what the season was really about.

I made my own Wall Quilt Advent Calendar.  You can pretty much use anything.  I have a friend who bought 24 mini stockings and hangs them on the wall.  Then you can put what ever kind of candy you want in them.  (I of course use Hershey Kisses.)  


Now, some where in the celebration of Christmas, Christ has been taken out of it.  Most celebrations anymore are purely Secular, revolving more around Santa Claus than Christ.  Don't get me wrong, I love Santa Claus.  St. Nicholas was a real man, who loved the Lord very much and his deeds in the name of the Lord are known far and wide.  However, it was not St. Nicholas, a Greek monk, that gave us reason to celebrate this Season.

To help my children understand why we celebrate Christmas, I decided to incorporate the Nativity Story in our Advent Calendar.  


Starting with the Angel Gabriel's visit to Mary and her visit to Elizabeth (Luke 1:26-55), we spend the first 12 days of December relating the Story of how Jesus' birth was foretold to Mary, who was a teenager and not yet married to her promised husband, Joseph.

We then jump to The Nativity Story (Luke 2:1-14) to spend the 12 days leading up to Christmas discussing the modesty that surrounded the Savior's birth.  Of all things we must never forget that the Hebrews were waiting for a King to come in and slaughter the Romans and reclaim the land for Israel.  They were not expecting a girl of modest means to birth their King in a stable.  We are presented a picture of true sacrifice from beginning to end.

We, as a family, make sure that the Advent Calendar is hung is a place of prominence in our house so that we will be reminded every day that it is up that we are learning of the true meaning of the Season.  The sacrifice of Mary and Joseph, the sacrifice of Jesus (the Man), and the sacrifice of God.  All of these sacrifices were for our redemption.

Kind of humbling, don't you think?